A Comprehensive Introduction to Git and GitHub
Version Control Unlocked: A Comprehensive Introduction to Git and GitHub.
In modern software development, code changes rapidly. Multiple developers edit the same files simultaneously, new features are introduced daily, and unexpected bugs require immediate rollbacks. Without a structured management system, this environment quickly descends into chaos—characterized by overwritten code, broken applications, and confusing folder names like source_code_final_v2_actual_final.zip.
This article introduces Git and GitHub, the foundational technologies that solve these collaboration and tracking problems, forming the backbone of the global software industry.
1. Understanding the Core Concepts
Before looking at terminal commands or user interfaces, it is essential to distinguish between Git and GitHub. They are related but serve entirely different purposes.
+----------------------------------------+ +----------------------------------------+
| GIT | | GITHUB |
| • Local Version Control System | ----> | • Cloud-Based Hosting Platform |
| • Runs on your machine | | • Hosts remote Git repositories |
| • Tracks file history and changes | | • Provides collaboration tools (PRs) |
+----------------------------------------+ +----------------------------------------+
What is Git?
Git is a local, Distributed Version Control System (DVCS). Created in 2005 by Linus Torvalds (the creator of Linux), Git runs locally on your computer. It monitors your project folders, tracks changes made to files, and maintains a complete historical record of every modification. Because it is distributed, every developer working on a project possesses a full copy of the project's history on their local machine.
What is GitHub?
GitHub is a cloud-based hosting platform built on top of Git. It allows developers to upload their local Git repositories (project folders) to a remote, centralized server. While Git handles the tracking mechanism, GitHub provides a visual interface, project management modules, and collaboration features that enable teams worldwide to build software together.
2. The Git Architecture: The Three States
To use Git effectively, you must understand its workflow architecture. Git manages your project files across three distinct virtual areas or states:
The Working Directory (Modified State): This is your local project folder where you actively create, edit, and delete files using your code editor. Changes here are untracked until you take action.
The Staging Area (Staged State): Think of this as a preparation zone. When you modify files, you flag them to be included in your next historical snapshot. Staging tells Git, "These specific changes are ready to be saved."
The Git Directory / Repository (Committed State): Once you commit your staged files, Git safely stores those changes as a permanent snapshot in its internal database (the hidden
.gitfolder). Each commit receives a unique cryptographic identifier (SHA-1 hash).
3. Practical Guide: Setting Up and Using Git Locally
Let us walk through a practical workflow to initialize a project, track changes, and save history using the Git command-line interface.
Step 1: Installation and Initial Configuration
Download Git from the official website (git-scm.com) and install it on your operating system. Once installed, open your terminal (macOS/Linux) or Git Bash (Windows) and configure your identity. Git requires this metadata to attribute code changes to a specific author.
bash
git config --global user.name "Your Name"
git config --global user.email "your.email@example.com"
Use code with caution.
To verify your configuration settings, use:
bash
git config --list
Use code with caution.
Step 2: Initializing a New Repository
Navigate to your project directory and initialize it as a Git repository.
bash
cd desktop/my_first_project
git init
Use code with caution.
Executing this command creates a hidden .git folder inside your directory, signaling that Git is now actively monitoring this project.
Step 3: Tracking Changes (Stage and Commit)
Create a new file named index.html inside your project folder. Check the current status of your workspace:
bash
git status
Use code with caution.
The terminal output will display index.html under "Untracked files" in red text.
To move this file from your Working Directory to the Staging Area, use the add command:
bash
git add index.html
Use code with caution.
(Alternatively, use git add . to stage all modified files in the current directory).
Running git status again will show the file filename in green under "Changes to be committed." Now, permanently lock this snapshot into your Git Directory with a clear, descriptive commit message:
bash
git commit -m "Initial commit: Add index.html boilerplate structure"
Use code with caution.
Step 4: Reviewing Project History
As your project grows and you add more commits, you can review your development timeline using the log utility:
bash
git log --oneline
Use code with caution.
This displays a clean, reverse-chronological list of your commits, showcasing their unique SHA hashes and commit messages.
4. Connecting Local Git to Remote GitHub
Working locally protects your project history, but it does not facilitate teamwork or cloud backups. To scale your development, you must connect your local repository to a remote repository on GitHub.
[ Local Machine ] [ GitHub Cloud ]
Working Dir --(git add)--> Staging --(git commit)--> Local Repo --(git push)--> Remote Repo
Step-by-Step GitHub Integration:
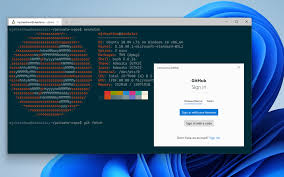
Create a GitHub Account: Sign up at
github.com.Create a New Repository: Click the "+" icon in the top-right corner of the GitHub dashboard, select New repository, name it, and click Create repository. Leave initialization options (like README or .gitignore) unchecked since we already have a local project.
Link the Repositories: Copy the remote HTTPS repository URL provided by GitHub. In your local terminal, link your local repository to this remote destination (conventionally named
origin):bash
git remote add origin https://github.com
Use code with caution.
Rename the Default Branch: Ensure your primary branch matches modern naming standards (
main):bash
git branch -M mainUse code with caution.
Push Your Code: Upload your local commits to the cloud platform:
bash
git push -u origin mainUse code with caution.
The
-uflag sets the default upstream tracking branch, allowing you to use simplegit pushandgit pullcommands in the future.
5. Collaboration Foundations: Branching and Pull Requests
One of Git's most powerful capabilities is its branching model. A branch represents an independent line of development. By default, your production-ready code resides on the main branch.
When you want to build a new feature or experiment with a bug fix, you create an isolated feature branch. This ensures you can write and test code without destabilizing the live product.
The Branching Workflow
Create and Switch to a New Branch:
bash
git checkout -b feature-login-pageUse code with caution.
(This creates a branch named
feature-login-pageand switches your context directly to it).Modify and Commit: Make code alterations, stage them via
git add, and execute a commit. These records exist solely on your feature branch.Publish the Branch to GitHub:
bash
git push origin feature-login-pageUse code with caution.
Pull Requests (PRs)
Once your feature branch is uploaded to GitHub, you do not merge it into the main branch immediately. Instead, you open a Pull Request on the GitHub website.
A Pull Request is a formal proposal to merge your feature branch modifications into the production branch. It provides a dedicated workspace where team members can review your code line by line, leave comments, run automated testing suites, and request alterations. Once approved, the project maintainer clicks Merge pull request, combining your code changes into the main codebase.
6. Crucial Git Commands Cheat Sheet
Command Syntax | Operational Purpose |
|---|---|
| Initializes a brand new local Git repository. |
| Lists modified, staged, and untracked project files. |
| Moves a file from the working directory to the staging area. |
| Saves a snapshot of staged files with an explanatory message. |
| Lists all local development branches within the repository. |
| Switches the working context to a different branch. |
| Downloads an existing remote repository onto a local machine. |
| Fetches changes from a remote server and merges them locally. |
| Uploads local repository commits directly to the remote server. |
7. Best Practices for Beginners
To avoid merge conflicts and maintain a clean project history, integrate these practices into your daily engineering routine:
Commit Regularly: Make small, incremental commits focused on single tasks. Avoid bulk commits that lump five unrelated feature updates together.
Write Meaningful Commit Messages: Write clear, imperative-style commit messages (e.g.,
"Fix broken login form validation", not"fixed stuff").Pull Frequently: Before you begin working on your code each day, run
git pull origin mainto fetch the latest changes your team members have made, reducing potential code conflicts.Utilize a
.gitignoreFile: Always create a file named.gitignorein your root directory. List files or folders that Git should never track, such as local environmental credentials (.env), system configuration files (.DS_Store), or heavy dependency folders (node_modules/).
Next Steps: Advancing Your Workflow
Now that you understand repositories, commits, branches, and remote hosting, you are ready to manage your own code repositories and contribute to open-source software.
Did you find this ICT insight helpful?